Game maker 2.3.0.529 studio полная версия
Содержание:
GameMaker Projects
GameMaker Studio 2 is not backwards compatible with Legacy GameMaker projects (those made with any version from 8.1 and below), but it will import projects made with recent versions of GameMaker: Studio 1.4 (v.157+ or ideally EA v.465+). However, that doesn’t mean they will run without making some major changes to the project structure, as a lot has been done to optimise and improve things in GameMaker Studio 2. The most obvious changes are that D&D actions have been overhauled and the code they create on import must be rewritten to fit the normal GML functions, and also the removal of the background resource and the changes to tiles (as covered above already). The functions dealing with these things no-longer exist in GameMaker Studio 2, and a number of other functions have been changed or removed (relating to views and drawing in particular.
However all is not lost, as GameMaker Studio 2 has a very comprehensive import system for your 1.4 projects that will create Compatibility Scripts and report on all the changes that need to be made to your project. Hopefully what this means is that any 1.4 project can be imported into GMS2 and then run with little or no changes from you to the code or resources.
For more information on how this works, please see the section below:
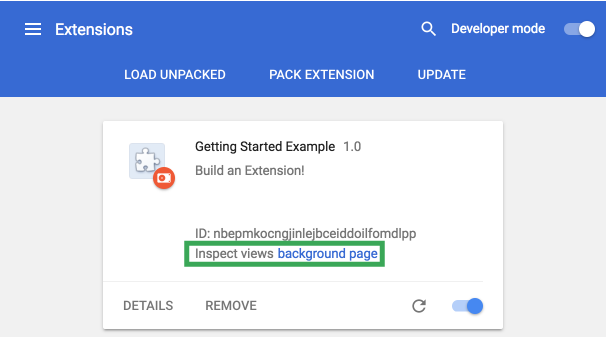
Porting A GM:S 1.4 Game To GMS2
FUNCTIONS, SCRIPTS AND METHOD VARIABLES
Above we outline some changes to the GameMaker Language, but now it’s time to talk about the good stuff… what’s been added! To start with we want to talk about in-line functions and scripts. Previously, a script was a single resource that was created on a global scope and used to create a single custom function which would then be called using the script name as the function name. This is no longer the case and scripts, while still global in scope, are now a type of «container» for one or more functions.
What this means is that when you compile your project, scripts are no longer called individually, but are actually all run at the start of the game in the global scope, so all variables that are defined in the script (outside of function definitions) will be considered global. That said, you should still use the identifier to explicitly define and identify global variables in your code.
The reason for this change is that scripts can now contain multiple functions. If you’ve only used GML to code projects then the idea of functions may be something new to you, but think of them as being the same as scripts, only explicitly assigned to a variable. This variable is called a method and is used to call the code that is in the function, the same as you would have previously called the script name. This is easier to visualise with an example, so let’s look at one. Consider this simple script :
Now, however, this would be defined as a function like this:
or like this:
You would call this function just as you would have called the script:
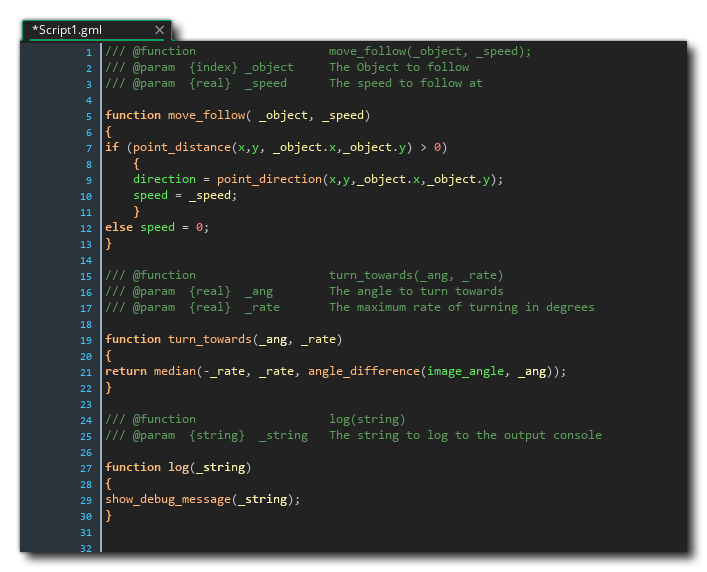
So, as we mentioned above, scripts can now contain multiple functions and these should be defined with the format shown above where you have the JS doc comment to identify the function, then the function definition below, and then the next JS Doc comment, and then the function, etc…
Above, we briefly mentioned that functions as variables were called method variables, but it should be explained in a bit more detail. Basically, when you create a function with a variable like this, you are creating a method variable, and they can have different scopes. Consider this function:
-
In the case of a script a variable called «foo» is declared at global scope
-
If the function is declared in an event then the variable «foo» is on the instance that ran that event
-
If the function is declared in an event using the keyword then the variable «foo» is local to the event only
-
If «foo» is declared inside a then it is declared on the that is active at that time
This means that if you have some code that you need to use only within a loop in an alarm event (for example), then you can define it as a local scope method variable at the start of the event and then use it within the loop without the need to clutter up the script assets with it.
It is worth noting that while the variable will be in the chosen scope, the actual function will be bound to the scope that it was initially defined in. Going back to script functions, these are all global scope and are considered «unbound» (ie: they are not associated with any instances), but if you have a script function that creates another function within it and then you call this script from an instance, the function used within the script will be bound to the instance. In general this is not something you ever need to think about but for more complex operations with method variables it’s worth taking into consideration. This also applies when using other constructs like — when you create a method variable inside a , the function will be bound to the instance that is currently in scope.
The following new functions have also been added to deal with methods:
Check the manual for details fo how these functions should be used.
NEW PHYSICS FUNCTIONS
There has been a major update to the built-in physics library, which now includes a soft-body particle simulation based off the Liquid Fun library for Box2D. permit the creation of simulated soft-bodies using rigid body physics. Basically, this means that you can create a shape from particles that maintain cohesion and so simulate a full body, which, due to the interaction of the particles, gives the impression of a soft body. You can also use the physics particles to simulate liquids and other particle based physics systems.
You can find out more information about the new physics particles from the YoYo Games Tech Blog and the GameMaker Manual.
AUDIO
There have been two important changes made to the GMS audio system. The first is that the dedicated music functions (like audio_play_music()) have been obsoleted and all sound files are now treated exactly the same way. These functions can simply be replaced by their sound eqivalents in your projects.
The second change is to add Audio Groups to the IDE as well as some dedicated GML functions to deal with them. Like with sprites and Texture Pages, your audio resources can now be grouped in the IDE and loaded into memory only when needed (and unloaded later again, when not). You can also set a gain value for a whole group making pause screen or end of game audio fades much easier to program than previously.
These audio groups are also configuration specific, meaning that you can create different groups for different configurations and target platforms. It is worth noting that the sound resources themselves are not configuration specific, but rather linked only to one single audio group, regardless of the configuration chosen.
Note that Audio Groups will not be in the initial 1.4 beta release, but will be added very shortly after in an update.
AppGameKit (AGK)
Мощный инструмент от The Game Creators Ltd., который подойдёт как начинающим, так и опытным инди-разработчикам. Компания была основана в 1999 году Ли Бамбером (Lee Bamber) и Риком Ваннером (Rick Vanner) — работниками Europress, одного из ведущих европейских издателей образовательных программ.
AGK работает по принципу drag & drop и использует собственный язык программирования — AppGameKit Script.
Ограничения пробной версии:
- лимит по времени использования — 14 дней;
- вотермарк компании-разработчика;
- невозможность экспорта на мобильные платформы и HTML5.
Существует несколько версий AGK, и все они используются в разных целях.
- AppGameKit Classic (930 рублей) — стандартная версия, где нет некоторых функций;
- AppGameKit Studio (1 659 рублей) — полная версия;
- AppGameKit Classic Mobile — мобильная версия движка: позволяет кодить «на ходу» в буквальном смысле слова; в отличие от предыдущих двух полностью бесплатна.
Для расширения возможностей будущего проекта разработчик может приобрести пакеты.
Как и Construct 3, AGK предлагает решения для образования. Для этого нужно отправить заявку и указать название образовательного учреждения. После прохождения верификации заявитель получит все бесплатные версии движка плюс комплект обучающих материалов.

Скриншот из FireRobots — игры, созданной на AGK. Скриншот: игра FireRobots / AppGameKit
Преимущества:
- прост в освоении, возникшие вопросы можно оперативно решить с техподдержкой;
- компилирует код для платформ Windows, Mac OS, Ubuntu, Android, iOS и HTML5;
- встроенная поддержка 3D, VR, AR, VFX и физики;
- подходит для разработки неигровых проектов.
Недостатки:
- нельзя сделать масштабный проект;
- несмотря на лёгкость освоения, нет знаковых хитов.
Игры на движке: Penguin Panic, Chopper, Sticky Orbs — список игр можно посмотреть на официальном сайте движка.
Скриншот из Castle Conquest — игры, созданной на AGK. Скриншот: игра Castle Conquest / AppGameKit
«AppGameKit — самый подходящий для меня инструмент. Это эффективный игровой движок и язык программирования, c которым я могу в короткие сроки разрабатывать оптимизированные приложения любой сложности. Его основные преимущества — простота, универсальность, кросс-платформенный охват и минимальная зависимость от стороннего программного обеспечения. Я пытался работать с Unity и UE4, но меня сразу оттолкнула сложность. По моему скромному мнению, задачи, которые легко решить на AGK, очень трудно реализовать на других движках».
Илья Образцов, программист, кандидат технических наук Тверского государственного технического университета, разработчик ПО для вузов и колледжей (VIRTLABS). «Made with AppGameKit…», 2019 год
Что в нем хорошего
GM:S очень хорош в управлении ресурсами, включением ресурсов в код, обеспечивает легкий способ изменения логики игровых объектов и событийное программирование.
Управление ресурсами
Как только разработчик создал спрайт, добавить его в GM:S можно за несколько кликов. После импорта спрайта, модификации могут быть сделаны уже в GM:S.
Создание спрайта.
Изменение спрайта.
Интеграция ресурсов в код
После импорта ресурса его свойства (размеры изображения, громкость звукового эффекта и т. д.) могут быть доступны из кода и могут быть назначены игровому объекту. Это делает создание игровых объектов очень простым и отлично подходит для быстрой подготовки и быстрого запуска.
Изменение логики игровых объектов и событийное программирование.
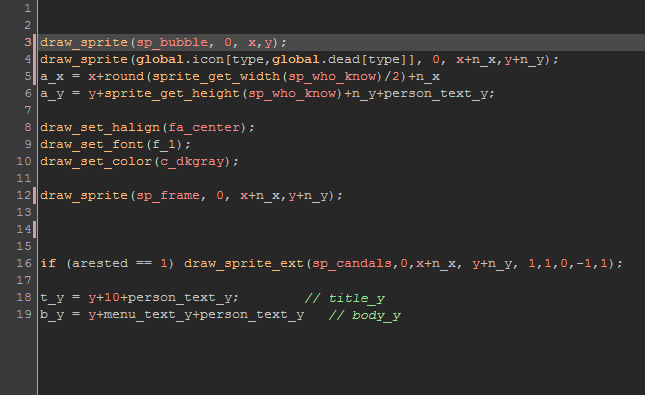
Редактор игровых объектов — это отличное средство обучения, для новичков в разработке игр, и предоставляет удобный способ изменения логики игрового объекта. Как вы можете видеть на этом скриншоте, GM:S позволяет вам писать код для конкретных событий:
Модификация событий игрового объекта.
View Ports
- room_set_viewport(room_ind,vind,vis,xport,yport,wport,hport) — set the viewport for a specific view in a specific room
- room_get_viewport(room_ind,vind) — get the viewport for a specific view in a specific room (returns array — xport, — yport, — wport, — hport)
- room_get_camera(room_ind,vind) — get the camera for a specific view in a specific room
- room_set_camera(room_ind,vind,camera) — set the camera for a specific view in a specific room
- view_get_camera(view) — get the camera for a view in the current room
- view_get_visible(view) — get the visible status for a the view in the current room
- view_get_xport(view) — get the xport for the view in the current room
- view_get_yport(view) — get the yport for the view in the current room
- view_get_wport(view) — get the wport for the view in the current room
- view_get_hport(view) — get the hport for the view in the current room
- view_get_surface_id(view) — get the surface_id for the requested view in the current room
- view_set_camera(view,camera) — set the camera for a view in the current room
- view_set_visible(view,visible) — enable or disable the visibility of a view in the current room
- view_set_xport(view,xport) — set the xport of the view in the current room
- view_set_yport(view,yport) — set the yport of the view in the current room
- view_set_wport(view,wport) — set the wport of the view in the current room
- view_set_hport(view,hport) — set the hport of the view in the current room
- view_set_surface_id(view,surface_id) — set the surface_id for the view in the current room
Как пользоваться
Не будем терять слишком много времени на теорию, так как наши читатели, скорее всего, пришли сюда ни за этим. Предлагаем перейти непосредственно к практике.
Загрузка и установка
Для получения среды разработки на свой ПК или ноутбук нам необходимо выполнить несколько простых шагов. Будем работать по следующему сценарию:
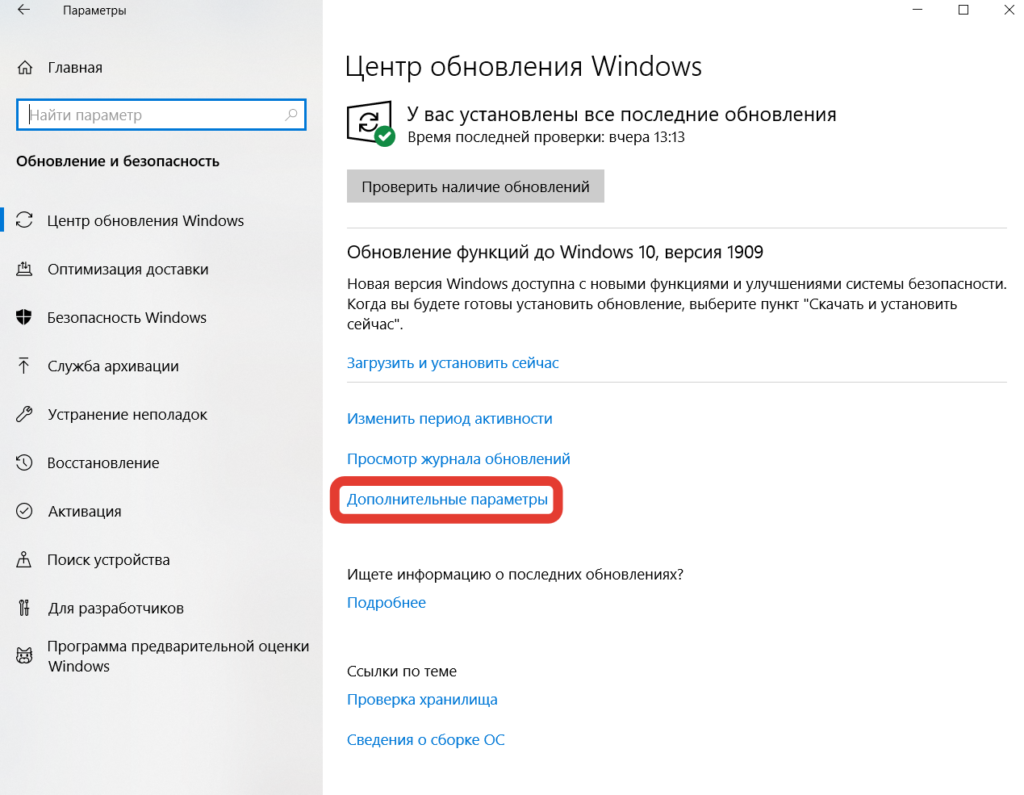
- Внизу странички расположена ссылка, кликнув по которой вы получите архив с установочным дистрибутивом программы. После распаковки архива запускаем инсталляцию, воспользовавшись исполняемым файлом, обозначенным на скриншоте ниже.

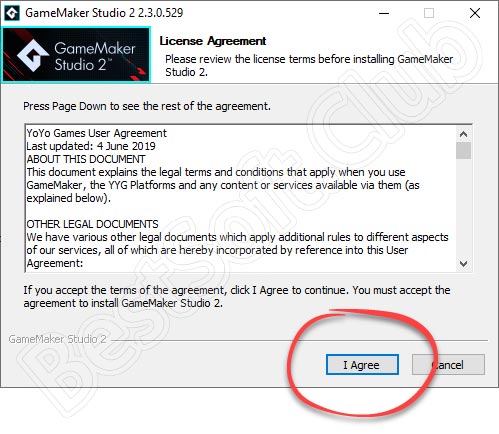
- В следующем окне необходимо принять условия пользовательского соглашения. Для этого кликаем по «I Agree».
- Дальше можем выполнить предварительную настройку ярлыков. После этого жмем по «Next».

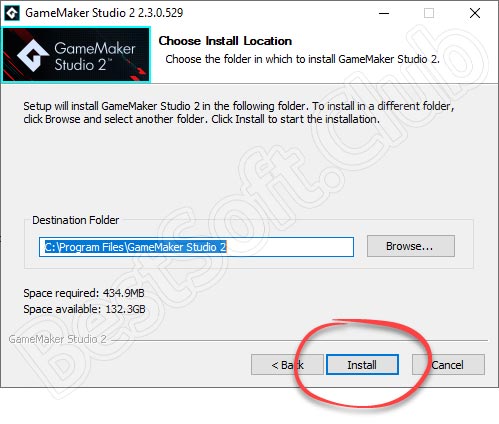
- В открывшемся окне можем сменить путь установки программы. Если все устраивает, кликаем по «Install».
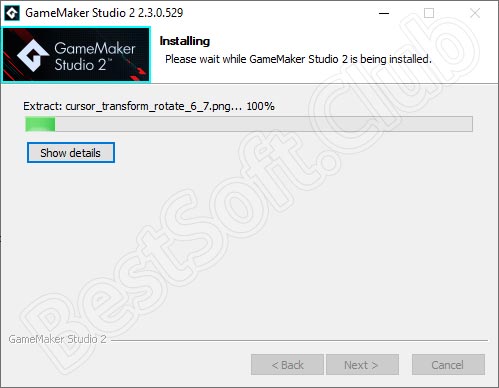
- Ждем несколько минут, пока процедура инсталляции подойдет к концу. В это время лучше не работать с ПК.
- Активацию утилиты производим согласно с инструкцией, описанной в текстовом документе, идущем в комплекте с архивом.

К сожалению, версии на русском языке пока нет. Для перевода пользовательского интерфейса требуется русификатор.
Инструкция по работе
Как только утилита Game maker studio будет установлена на компьютер или ноутбук, можно смело переходить работе с приложением. Запускаем программу и вводим данные, зарегистрированные на официальном сайте ПО. Для создания нового проекта кликаем по «Создать», после этого откроется окошко «Drag and Drop», где можем задать имя будущей игры. После открытия проекта в правом углу будут расположены вкладки с частями игры. Если самостоятельно разобраться с функциями утилиты не получается, всегда можно просмотреть обучающее видео в сети.

Становимся профессионалом
Несколько GameMaker игр стали коммерчески успешными, и есть много других великолепных GameMaker игр, которые являются прекрасными примерами того, что возможно создать используя GM:S.
Отточеные игры
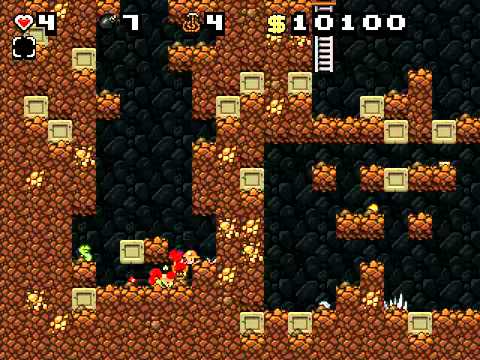
Spelunky — оригинальная версия Spelunky была создана в GameMaker; более новая XBLA версия и новая ПК-версия игры, нет. Это коммерческий успех, версия, созданная в GameMaker, бесплатная.
Spelunky Trailer
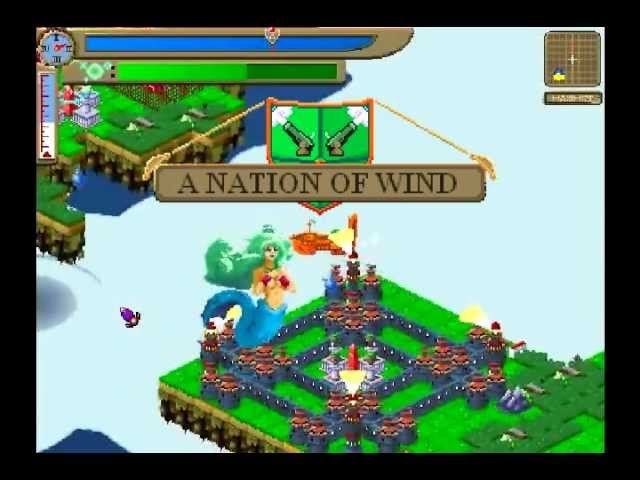
A Nation of Wind — эта игра скрытый драгоценный камень и в нее стоит определенно поиграть.
A Nation of Wind — Trailer
Dustforce — вышла в Steam, это не был огромный коммерческий успех, но тем не менее, это отличная игра!
Dustforce — Debut Trailer

Коммерческие хиты
Hotline Miami gameplay

Gunpoint Launch Trailer — A 2D stealth game about rewiring things and punching people
Stealth Bastard Deluxe — Launch Trailer

Aces of the Luftwaffe — Universal — HD Gameplay Trailer

Возможности программы
GameMaker Studio 2 — вторая версия популярной программы для создания любых игр. Воплощайте свои идеи в жизнь, превращайте игрушки в настоящие шедевры и сделайте все возможное для того, чтобы они пользовались большим спросом. Приложение упрощает создание любой игры, даже самой сложной и масштабной. Вы можете заняться созданием как инди-игрушки, так и высококачественной MMORPG, в которую будут играть миллионы по всему миру. Главное, придумать идею и продумать процесс создания до мельчайших деталей. Здесь создан специальный рабочий экран с нужными инструментами и параметрами, с которыми даже не нужно писать специальный код. И без него получится любая уникальная игра. Разработайте игру наивысшего качества и получите славу мирового разработчика. Перетаскивайте новые элементы, технологии искусственного интеллекта, все самые новейшие параметры разработки должны быть учтены в игровом пространстве. Можно создавать игры не только на ПК, а и на мобильные устройства или браузеры. Вы сами выбираете концепцию игры, а также платформу, на которой она будет разворачиваться. В программе созданы специальные панели, в которых можно узнавать все о вашем приложении, вплоть до количества загрузок и прочей аналитики. Очень удобные инструменты содержат всю информацию про создаваемую или уже выпущенную на рынок игру. Вы каждый день можете проверять активность пользователей, участвовать в обновлениях и изменениях в режиме реального времени. Для тех, кто давно мечтал создать собственную игру любого жанра — это шикарный вариант. С программой сможет разобраться любой, даже неопытный пользователь ПК, потому как здесь даже не нужно кодить. То есть, способностей программиста тут абсолютно не нужно никаких. Скачайте торрент GameMaker Studio 2 и прокачайте свои навыки в создании уникальных игр.
Программные процессы
Программа содержит ряд полезных и уникальных функций, которые точно пригодятся вам при создании любой игры. Вас встречает идеальная среда для разработки двумерных игрушек разного жанра. Это могут быть инди-игры, платформеры, классические hack and slash или рогалики. Пользуйтесь неограниченными ресурсами приложения, а также активным форумом, в котором можете спрашивать любой совет у таких же разработчиков, как и вы. Интерфейс программы очень простой в освоении, разберется любой пользователь. Кодить ничего не нужно, тут уже все, что вам понадобится при создании, сделано. То есть, естественно, язык программирования присутствует (и не один), но вы самостоятельно ничего не будете кодить. За вас это сделали умелые программисты, оставив вам лишь площадку для создания игр, как банальный конструктор в детском саду.
Версии приложения
Изначально была одна версия программы, но впоследствии приложение разделилось на две редакции: упрощенную (Lite) и профессиональную (Pro). Профессиональная версия расширяет возможности игрового редактора, добавляя, например, функции:
- создания многопользовательского режима;
- импортирования и экспортирования ресурсов для совмещения разных проектов;
- продвинутого редактирования изображений и анимаций;
- расширенных средств программирования.
Профессиональная редакция также может работать в Windows 7 и других версиях. При запуске в ней отсутствуют всплывающие надписи, призывающие к обновлению до версии Pro, а в создаваемых программах нет логотипов.
Разделение приложения на Lite и Pro актуально для версии 8.0.
EXCEPTIONS, TRY, CATCH AND FINALLY
The final new language feature that has been added in the 2.3 update that we want to discuss here is the ability to control to a much greater degree how errors are handled when they are encountered in your code as well as the ability to generate your own error messages.
To start with we have the new operator, which — as the name implies — can be used to «throw» a runtime error message. This has the following syntax:
The expression used can be a value or a string or any other data type, and this will then generate an exception error which is — by default — shown on the screen, and on closing the error message the game will end. For example calling this:
will cause the following unhandled exception error to be shown:
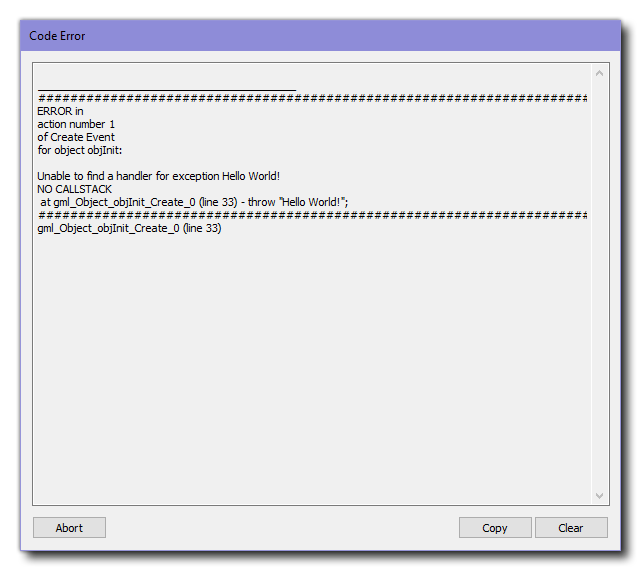
This is the default way the error can be handled, but you can «take over» this error message and use your own handler code by calling the new function . This runtime function permits you to supply a custom method to use that will be called whenever any unhandled exceptions occur in your game.
Apart from the ability to throw your own errors and handle them using functions, we also have the new , , and operators. These can be used in your game for error checking and permit you to test out blocks of code and control what happens if any runtime exceptions occur. Using these will prevent the exception ending the game and will also prevent showing the standard error message to the user, but this means that you will have to handle what happens next in this case, like — for example — saving out log files and ending the game gracefully (note that if you choose to do nothing, your game may become unstable and not perform correctly).
At it’s most basic the syntax is as follows:
However, having a without anything to actually handle any exceptions the code may produce will not be very helpful, so we usually pair it with a , with the following syntax:
What does is permit you to run extra code supplied in the following block when an exception from the previous has been caught. If this is a runtime exception, then the supplied variable can be used to access a struct which will contain the following information:
A simple example of use is shown below:
It may be that you want to run some code regardless of whether an exception was thrown or not, and so for that you can add in a block. The syntax is:
It is worth noting that you can have any combination of these together, ie: / , / or / / , and that within the block you cannot use , , or statements as they have no meaning in this context and the compiler will generate an error if they are used.
Camera functions
- camera_create() — create a camera
- camera_create_view(room_x,room_y,width,height,angle,object,x_speed,y_speed,x_border,y_border) — create a camera with settings for a view in a room
- camera_destroy(camera) — destroy the given camera
- camera_apply(camera) — apply the camera settings to the current camera
- camera_get_active() — get the current active camera
- camera_get_default() — get the current default camera (camera used when there are no views active)
- camera_set_default(camera) — set the given camera as the default camera
- camera_set_view_mat(camera,matrix) — set the view matrix of the given camera
- camera_set_proj_mat(camera,matrix) — set the projection matrix of the given camera
- camera_set_update_script(camera,script) — set the update script to use on the given camera
- camera_set_begin_script(camera,script) — set the begin script to use on the given camera
- camera_set_end_script(camera,script) — set the end script to use on the given camera
- camera_set_view_pos(camera,x,y) — set the view position on the given camera
- camera_set_view_size(camera,width,height) — set the view size on the given camera
- camera_set_view_speed(camera,x_speed,y_speed) — set the view speed on the given camera
- camera_set_view_border(camera,x_border,y_border) — set view the border size on the given camera
- camera_set_view_angle(camera,angle)- set view the angle on the given camera
- camera_set_view_target(camera,object) — set the target object for the given camera
- camera_get_view_mat(camera) — get the view matrix for the given camera
- camera_get_proj_mat(camera) — get the projection matrix for the given camera
- camera_get_update_script(camera) — get the update script for the given camera
- camera_get_begin_script(camera) — get the begin script for the given camera
- camera_get_end_script(camera) — get the end script for the given camera
- camera_get_view_x(camera) — get the view pos x value for the given camera
- camera_get_view_y(camera) — get the view pos y value for the given camera
- camera_get_view_width(camera) — get the view width for the given camera
- camera_get_view_height(camera) — get the view height for the given camera
- camera_get_view_speed_x(camera) — get the view speed x for the given camera
- camera_get_view_speed_y(camera) — get the view speed y for the given camera
- camera_get_view_border_x(camera) — get the view border x for the given camera
- camera_get_view_border_y(camera) — get the view border y for the given camera
- camera_get_view_angle(camera) — get the view angle for the given camera
- camera_get_view_target(camera) — get the view target object for the given camera
Возможности
Структура игры, созданной в программе Game Maker, состоит из набора разнообразных объектов. Их дизайн редактируется с помощью спрайтов, а поведение описание реакции на те или иные действия игрока. Процесс создания напоминает работу с блок-схемами и использует режим drag-n-drop (перетаскивание специальных иконок с действиями в ячейки событий). Для совсем опытных юзеров создан свой собственный язык GML (напоминающий JavaScript). Он поддерживает синтаксис популярных языков (PHP, JS, Pascal), поэтому для написания кода можно использовать один из них. Это значительно расширяет возможности пользователя.
Программа имеет встроенный редактор позволяющий настроить поведение и внешний вид объектов, создать различные цели, которые надо выполнить игрокам, задать время для этого.

Обновление добавило поддержку HTML5. Это позволило разрабатывать приложения не только для компьютеров и мобильных телефонов, но и интернет браузеров.
Основные возможности:
- создание двухмерных игр без знания основ программирования;
- возможность использования режима drag-n-drop (дословный перевод – перетаскивай и бросай);
- использование собственного скриптового языка GML (Game Maker Language), похожего на JavaScript;
- создание собственных библиотек действий с помощью Library Maker.
Быстро и без особых усилий можно создать простую игру со своими правилами и целями. Благодаря этой программе пользователь может получить новые навыки и проявить творческие способности, даже без глубоких знаний языков программирования. Специалисты используют дополнительные скрипты, чтобы расширить возможности GM. Начинающие программисты используют ее для расширения своих знаний и получения опыта в сфере создания игр.
Встроенная система звуков поддерживает различные форматы аудиофайлов, но дополнительно созданы специальные DLL библиотеки. Можно добавлять фоновую музыку или эффекты.
Системные требования очень простые и позволяют запустить GM на системах с операционной системой Windows XP и выше. Качественный русификатор позволит без проблем использовать все возможности и функции, а простой и дружественный интерфейс – быстрее разобраться даже неопытным пользователям.
GML
The GameMaker Language has also seen a few changes to it, with the addition of new data types, namely pointers and enmums. The texture functions and a few of the other functions that create dynamic resources will now return a pointer for the resource, while enums can now be created for use in your games. For more details of these features, please see the GameMaker: Studio Manual.
There have also been some new functions added to get information from Spine sprites, extra functions for local push notifications, some new buffer functions that permit the saving of groups of files (mainly for Console support), and SWF format sprites now have some dedicated functions that can get and set their AA level.
Runtime Changes
Many functions have been added in GameMaker Studio 2, the following sections outline those that have been added and those that have been removed, please consult the manual (Help -> Open Manual) for further info.
Our Windows Desktop Runner has also changed from using DX9 to using DX11 this may mean that there are some compatibility issues that may need to be addressed, there are some known issues at present
- No Anti Aliasing implemented — all functions return 0 for the number of anti aliasing levels, we will implement this in the future
- Line drawing — unfortunately line drawing is not consistently implemented by hardware vendors, this means that between different manufacturers and different drivers from the same manufacturer you may get different results, we reccomend that you do not rely on line drawing in released games, but the functions are still there for you to try.
- Windows XP is no longer supported for games created using GameMaker Studio 2.
Workspaces
The first major change you’ll see on starting a new project with GameMaker Studio 2 is that you are now presented with a workspace. This is an area that will hold the windows associated with the resources that you are working on and it can be zoomed and panned as if it was an actual desktop area. To move around the workspace you can click the middle mouse button and move — or hold down Space and left click — to pan around, with holding down Control and the mouse wheel being used to zoom in and out.
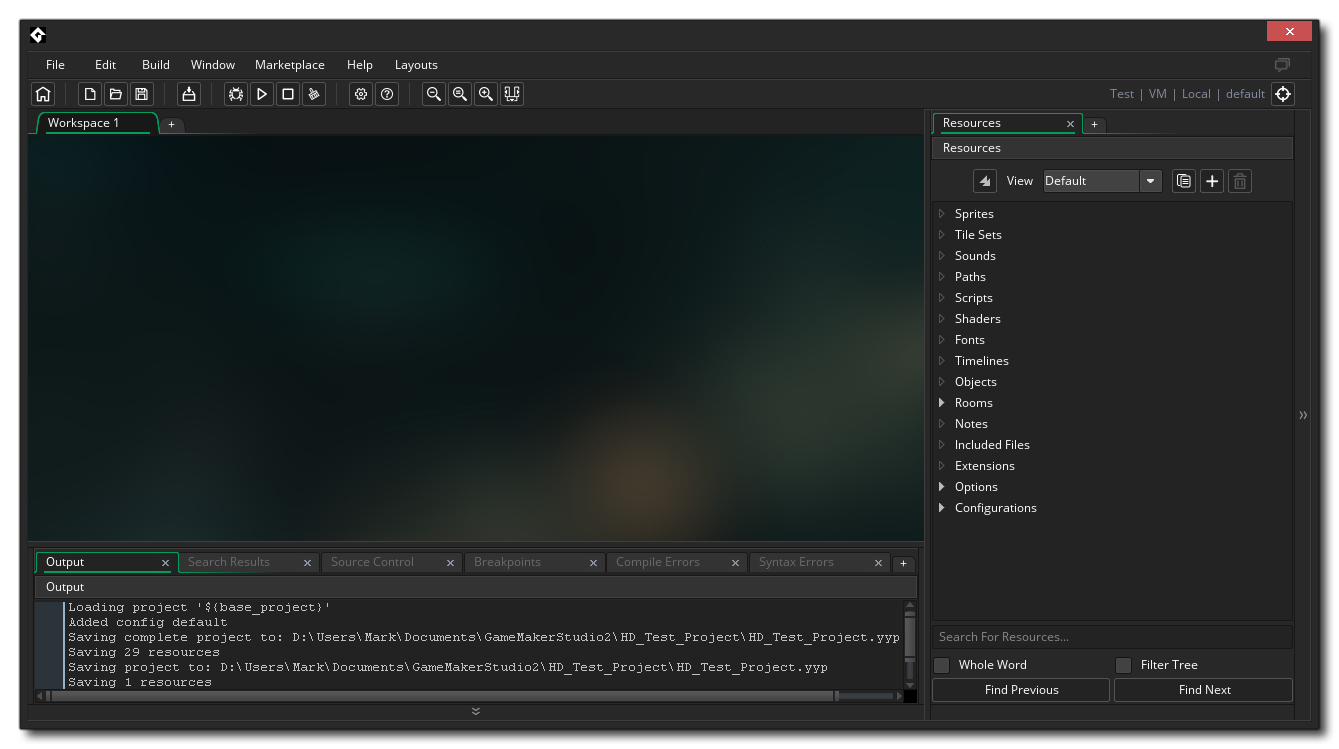
One of the main features of the workspace is that you aren’t limited to just one of them, nor are you limited to having everything in the same window. If you click on the workspace tab at the top, you can drag it off of the main GameMaker Studio 2 window and it will create another sub-window for the project that can then be positioned elsewhere (like in another monitor, for example). You can also merge any secondary workspaces with the main window by clicking the tab and dragging it back onto the main IDE. Each workspace can also be named to easily identify it by double clicking on the tab name and typing the name you prefer to have.
Apart from having multiple workspaces, you can also dock windows to the sides and the bottom of any active workspace.
A docked window will remain fixed to the chosen workspace, and you can open and close the dock by clicking the small arrowed button on the side. In this way you can quickly get more space to see what’s happening by closing a dock and then expand it again as required. Note that there is a button at the top of the IDE to quickly expand/collapse all docks at once.